Showing posts with label crafts. Show all posts

Tuesday, July 21, 2015

Silver Linings

It’s been a month of finding silver linings. Chateau Gahan experienced flood #4 since we’ve lived here. The first was when the ice maker line blew off the back of the fridge. My parents were picking Harleigh up from school and arrived in my driveway to see water pouring out from under my garage door.  I hightailed it home, tears streaming down my face, and pulled in to find that my parents and daughter had pulled out as much furniture as they could carry outside to the front of the house. It was chaos.

The second flood was the hot water heater expansion tank, the third the hot water heater itself. And because my hot water heater is in a closet in the center of the house, the water damage extended into the living room, hallway, my closet and my vanity area. This time, the fourth, was the water pressure regulator. It was 15 years old and died, causing the water pressure to skyrocket. The pressure was too much for a water line under my vanity sink (the line probably original to the house), and a small pin hole spewed water likely all night. I got out of bed in the morning because I heard water running and knew Harleigh wasn't up yet. Took three steps, and was standing on wet carpet.

As Harleigh and I hauled and sopped, she simply grabbed my wrist, looked me straight in the eye, and said “Mom, we got this.” And we got through it. The last of the shoe molding goes in today.


We twisted through zippered doorways for days on end. 
Endured the 24/7 deafening whir of giant fans and dehumidifiers. 
Gideon ate and drank from bowls on a shoe shelf from the foyer closet.
With most of the furniture temporarily stored in the garage, 
we jockeyed for seating on any surface that wasn't piled with our lives.


And the silver linings, once again as they always do in our make-the-most-of-a bad-situation little household, proved themselves too numerous to count.

  • Got gorgeous 5”-plank hardwoods . . . 
  • . . . and as everything was moved back into the living spaces I cleaned like a crazy woman, a long overdue deep clean. 
  • All the windows got washed inside and out. 
  • I got to work with a water damage restoration company that I have built a good relationship with over the many floods — good people, always positive. 
  • Harleigh and I practiced and succeeded at taking things in stride, accepting what was, being OK with living conditions not being perfect. 
  • We purged a lot; there’s nothing like having to move your personal belongings to make you question what is worth keeping and what just isn’t. My efforts at simplifying got a little kickstart with the great flood of 2015. 
  • Harleigh and I also spent a lot of time together, holed up wherever there was space for two women and a giant dog. Her room, with the full bed gone and two twins in its place, was sort of our headquarters. And with this picture above Harleigh’s bed, it seemed the perfect room to escape to for chilling out and counting our blessings amidst the shambles right outside her bedroom door.


Gideon fared the best of all through it. With our house filled with work crews and machines for days on end, he was relegated to Harleigh’s room, where I made up his bed on hers, with the blinds up so he could watch all the goings-on in the driveway. He was in heaven, like a little boy watching a construction site.


A day into the mess, Harleigh came home with flowers for me. It meant a lot. She knows that little gestures like this are part of my love language.


The one project I got done before my craft room became filled with closet contents, lamps and home decor from the damaged rooms was to cover my new Bible. I’ve always wanted a journaling Bible, and I found one at a good price, but the cover was anything but pretty. I took the dust jacket off and used that as the base, covering it in some calico fabric, adhering it with Mod Podge. Then I glued a metal scrapbooking embellishment on the cover along with a mustard seed charm. A reminder that "with faith nothing is impossible" seemed a fitting mantra for the challenging time we’ve just lived through.


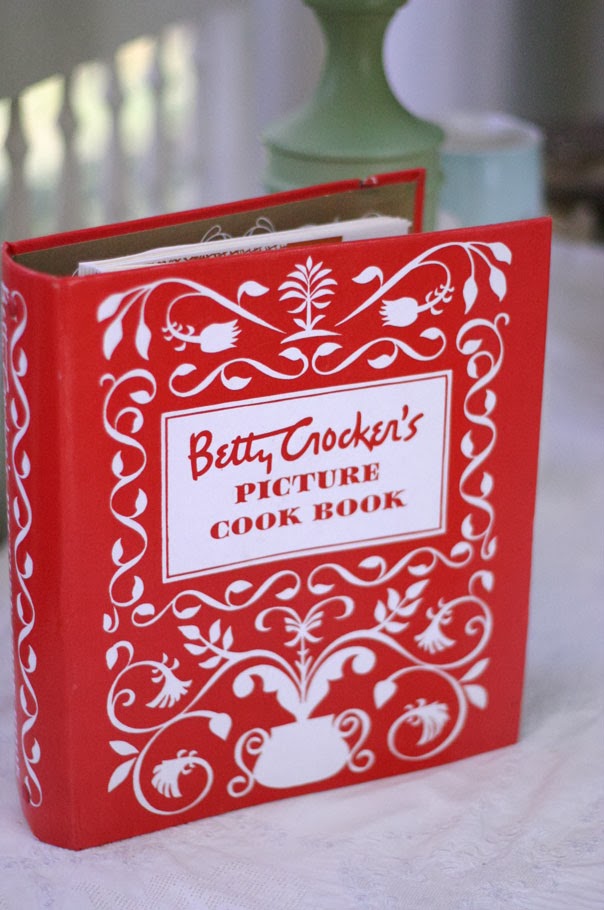
And on a final note, this book! What a page turner. Highly recommend.


Stay tuned for a post I hope to get up next week of the adoption baby shower I designed.
Lee Ann, who had hired me to design the nautical baby shower, asked me to do all the decor for an adoption shower (the adopting parents also happen to be dear friends, so that made it super special!).

Thursday, March 5, 2015

Booth Crafts

Come to find out, the items I craft and put in my booth have been selling like hotcakes. My refinished furniture, gone within days (scroll to the bottom of the linked post). The pieces of wood I've found on beach vacations got prettied up with painted words and images, and I couldn't make them fast enough. Custom-crafted bulletin boards made using old windows. Old chandeliers de-electrified, painted, candles added . . . sold as outdoor decor. Ice skates, embellished and turned into Christmas decor. Valentine gift boxes. A vase made from books. A paper lantern covered in crocheted doilies. A mirror covered in shells. Beachy journals. A patio umbrella recovered in a vintage tablecloth. Calico bunting with ball fringe. Good sellers, all of them.

With 2015 being the year of the purge, I've enjoyed living a simpler life AND gifting others with items that I've lovingly created. It's a win-win.

With probably 15 giant pickle jars taking up real estate in my two-car-garage-that-only-fits-one-car, it was about time to come up with a project. And tah-dah . . . the K-Cup Jar was born! I used one in my kitchen for awhile before the calendar turned to 2015, and my counterspaces were begging to be cleared of stuff — cute stuff no doubt, but stuff nonetheless. Each jar holds 32 cups. And, come on, cute or what???  I even saved up empty K-cups and re-lidded them with white paper so that the jars would stage nicely. These three are "the Kitten Edition." With more jars to get rid of, there's bound to be a new edition to come!


Thursday, October 16, 2014

A Wedding This Weekend

I was honored to be asked by a past co-worker, Steve, and his fiancee Beth, to do my thing for their big day! The wedding is tomorrow. Atlanta promises to be in the 70's with no rain. Keeping our fingers crossed. It's outdoors. A bonfire (with s'mores!). BBQ. Tubs of cold drinks. Corn hole. I came up with a plan for decor, presented it weeks ago, and am now putting the final touches on all that I'm crafting.

A little peek—I hand-painted all the dinner napkins. The color palette I'm using is matched down to the paint used on the napkins. As with all events I do, I use Pantone chips to create my palette, and make a little card that I carry with me everywhere as I'm planning and shopping.


When I made my design presentation, I staged some of my ideas. 
Beth loved the idea of using pumpkins (our Pinterest board was so very helpful 
in honing in on Beth's tastes), and in order to pull in the teal blue from the palette,
I bought a fake pumpkin and spray painted it using Montana paint.
(If you're not familiar with Montana, it's the spray paint that graffiti artists, the pros, use.
It comes in 204 colors. I buy mine at Sam Flax. I'm like a kid in a candy store.
It's not that much more expensive than the spray paints you buy at the hardware store,
it goes on flawlessly, AND you can find any color, a-n-y c-o-l-o-r!)

This staged arrangement used silk flowers, but will be real flowers for the big day!
The flowers I'm using:
Sunflowers
Orange lilies
Peach stock
White hydrangea
Viking poms
Light pink garden roses
 Purple lisianthus

I had hoped to use lilac, but the order I would have had to place (flown in from Holland)
would have busted my flower budget. Bummer.


Teal-blue wooden dowels with jars of flowers will be stuck in the grass 
and line the aisle at the ceremony.


Blue Mason jars on the dining tables will be used for candles.


My vast array of aluminum ware will be put to use. 
Accented with teal rick rack, each piece will be different and hold an explosion of flowers.


Will share more images from the event itself. Lots of little touches!

 Two miscellaneous Instagram images from the past week: 
My fruit bowl "dressed" for Halloween.
And Gideon asleep on my bed. Maybe one of my favorite pictures of him.


Tuesday, September 9, 2014

When Friends See "Trash" and Think of You

Ali spied this huge window at the curbside and, if I'm not mistaken, ran home to talk her husband into coming back to help load it into the car . .  and all for little ol' me. I've held onto it for probably a good two years, knowing that I'd put it to good use one day. And that day came on May 10. Friend and co-worker, Julie, had asked me to style her wedding. This lucky find was turned into the perfect table assignment chart. I cleaned her up real good and gave the wood a coat of fresh white paint. I keyed the guest list into Word and then chose the script font she had used on her wedding invitations. I printed out the panels — black type on white paper — and then taped them to the back of the window panes. With a white liquid chalk marker, I simply traced the names onto the front of the window panes, removed the white sheets from the back, and then taped black paper onto the back of the panes that had writing on them (for some reason, in the picture the black looks like rippling fabric, but it was a nice solid matte black). Topped it off with a ribbon, flower, twig and bird (she had a bird theme for the wedding). From dumpster to diva!

Saturday, August 9, 2014

Pool Noodle "Candle" Centerpieces

Christina Pugh, one of Harleigh's dearest friends and a photographer
also works at Camp All-American.
She plays a big part in the planning and set-up of the end-of-summer CAA banquet,
attended by all the counselors, staff, supporters, and host families.
She asked if I would help her out, and I offered to create the table centerpieces.

What I knew to be true:
1) The tables would be round banquet tables
2) Black tablecloths
3) Figuring on roughly 300 people, 30 dining tables
4) Dinner — buffet style
5) The huge room would be on the dark side most of the dinner and subsequent program
6) After dinner, everyone would help break down the tables and move everything off the floor to make room for dancing.

I knew I wanted candlelight. It's elegant and would make the evening feel special
for a ton of people who had worked their tails off all summer.

I also knew that the centerpieces had to have some substance.
Didn't want something small swimming in the middle of a large sea of tablecloth.

The biggest challenge was that the centerpieces would have to be easily moved 
when the room was converted into a giant dance floor.

I came up with the idea to use pool noodles to create "candles."
How kitschy. What a nod to summer. And how easy a craft to tackle!

I debated using real tea lights, but with the centerpieces having to be moved right after the dinner program, I didn't want there to be liquid wax spilling. So I opted for the battery-operated flickering tea lights. I purchased these from Amazon, and they were amazingly real and bright.

• I purchased 60 pool noodles. It took 2 noodles to make one centerpiece.
• Cut the noodles into varying lengths with a super sharp chef's knife, careful to make a straight cut on one end. Some of the ends I wanted slightly angled to give them the look of a real, melting candle.
• Then, with an exacto knife, I cut a circle in one end of each noodle. The circle was the width and depth of the tea light (I wanted only the flame of the tea light to show, so the depth had to hide the plastic base of the light). I made sure not to cut them any larger width wise. At the same size, or better yet, even a tad smaller, the hole hugged the tea light nicely, keeping them intact, but still easy to be removed for turning on and off.
• After I cut the circle, I made another cut at the base of the first cut so that the circular piece of noodle could be lifted out to leave a hole for the tea light.
• I cut out 30 pieces of  13" x 13" sturdy black card stock to glue the candles onto. This would make them easy to move (and the black blended in with the black tablecloths, so you really didn't even see the board).
• I then glued the noodle pieces together with a small string of glue between each, and glued each on the bottom. I could have just glued them on the bottom and onto the card, but I wanted them super sturdy, and I didn't want gaps between them. I tied a piece of string around the grouping while they dried to keep them together, then cut the string off when the glue dried.

Here is the finished product.
I had some leftover pieces of noodle that I used as single candles 
and in small groupings on the buffet tables.


Here are just some of the 30 centerpieces in my garage ready to go to the banquet.


Unfortunately, I didn't get any pictures of the banquet room with the lights down and
all the centerpieces lit. But let me tell you . . . it was spectacular, if I must say so myself.
And everyone loved them.

I did shoot this video at home so you can see just how great the tea lights are!


The tea lights are going into the church event stash.
And I plan on taking all the noodles apart; camp can use them next year for a game or something.

This would be a great idea for tables at a pool party.
Or for a kid's summer birthday party.

Tuesday, June 3, 2014

Weird Animals VBS

Gotta admit, that when I found out the theme of this year's VBS, Weird Animals, I was not feeling it, at least from a decorating standpoint.
I watched the video from Group on how they created the set and related decor, 
and I was still lukewarm.

But woah.
Once we started creating, it was pretty magical.
The theme was extremely forgiving in that anything goes and more is better.
And since it's based on fantasy creatures and habitat, 
there really weren't any rules.

Here is the entrance to the sanctuary.
Used the Group elephant ear leaves to make an archway.

At each column we set spray-painted fake plants.
We actually spray painted a lot of plants. 
What church doesn't have an unending supply of those ancient, dusty
and hardly appealing fake ficas trees and ferns around?
We decided to retire some of ours and sprayed them with fluorescent paint. 
The result was was more attractive than how they usually look!


The one on the left got a rainbow paint job.
Don't forget the trunks; here on the right it's yellow with black stripes.
And don't forget to paint the Spanish moss that serves as filler in the pot!
For the ferns that normally live in the sanctuary (and were off limits for painting),
we stuck some of the fan flowers in them.


We had ordered two of the Hip Habitat Fabric Wall Hangings.
Rather than build a PVC frame, we used six rolling walls, 
attaching the fabric to the back of the walls using Tpins.
By using the walls, we were able to angle the hanging nicely 
(rather than it being a straight line).


More spray-painted plants.
(The fan to make the waterfall appear to flow is hidden behind the ferns.)
We also thought it would be cool to use a sound machine that has the water feature on it.


The giant flowers were so much fun to make!
I used a different painting scheme than Group.
We spray painted the flower petal edges (I think they used regular paint 
and then sprayed water and feathered the edges).
I sprayed black around the centers to make them pop.
We made stands for flowers using leftover insulation foam.

For the grasses in front of the flowers,
I made flowers using pipe cleaners and pom poms.

The bases of the large flowers are covered in the Group-purchased
water fabric.


The waterfall happened to be one of my favorite projects. 
I had Ace Hardware save me super sturdy Stihl boxes (the long ones trimmers come in),
and these were the perfect base for the waterfall rock walls.
The smaller walls on each side are separate pieces, so everything can be disassembled and moved.
I used two colors of cellophane for the water (teal blue and iridescent).

Once the rock walls are painted, I sprayed on that Krylon
Stone Spray Paint to give them some texture and realism.


For the pond, I found pictures of koi fish online, printed them out, 
cut them out and put them under the topmost layer of cellophane.


This little guy is a line-art fish drawing I found online, painted him all weird,
and put him onto a plexiglass stand so it looks like he's jumping.
I used white liquid chalk to make the water rings.


We made tons of truffula trees and used them as markers on the pews
to designate where the specific crews sit.


For all of our large foam pieces we used the 2" foam.
Hands down, one of our best decisions.
Amazingly sturdy.
Which is a must since we take all of our decor and pass it forward at least twice.

For the large trees, I wasn't crazy about Group's foliage (the wraparound of bulletin board paper),
so I opted for using crepe paper flowers 
and hanging Group-purchased "Spanish moss" from the branches. 
(Both flowers and moss are attached with Tpins, which will allow for easy removal, transport and reattachment when passed on to the next church!)


In our Fellowship Hall, for the snack table centerpieces,
I went to my trusty (and huge) stash of pickle jars stored in my garage.
Each jar got two pieces of the 2" foam glued inside (to brace the metal-skewered sign),
surrounded by spray-painted dried Spanish moss. 
We tucked some plastic critters inside, embellished the empty space
at the top of the jar with curled pipe cleaners and pom poms, 
and voilà!


I reached out to display/outdoor signage companies for pieces of large cardboard, 
my Ace Hardware men for boxes (and they mixed all my paint 
and had it ready for pick up a few days later).

For the wishing well which we used for a Bible skit,
I had been to the local high school drama production of Beauty and the Beast and 
seen a great wishing well prop complete with wheels.
I called after the production ended and asked if they loaned props.
She said they would take it apart, so if I wanted it, come and get it!
It's huge, with a crank, bucket and rope.
I've found that when it comes to VBS, 
locals are always willing to pitch in and help any way they can!

Monday, May 5, 2014

Escape


This weekend it really hit me just how much social media and the digital world
have taken over my life. Sorta made me sad.
On Sunday afternoon, after a full weekend, I escaped to the back patio with Gideon
TO
SIMPLY
SIT.

When was the last time I did that?
Without a phone or a laptop.
Or a camera.

I sat in my cheap, plastic Adirondack chair,
my hands, palms up, on the arms of the chair,
my head resting on the chair back,
the serenity and warmth 
causing my eyelids to drop and my 
whole being
TO
BASK
IN
CALM.

The house was in shambles.
The garden in need of weeding.
Dustbunnies everywhere.
Laundry done and folded but in piles on my bed.
Everywhere I looked, I saw work to be done.


My usual escape is to play a game of solitaire on my phone.
Catch up on Pinterest.
Post and peruse Instagram.
Watch the newest episode of Housewives of NYC on my laptop.
Listen to music.
Watch TV.

As I sat in the chair on my patio, 
a peace came over me that I've not felt in quite some time. 
Escaping without an outlet, a keypad, a screen.
What a novel idea.
Instead, I was plugged into the sounds of birds chirping and kids playing, 
the smells of cut grass and my neighbors grilling,
the feel of a warm breeze stroking my face and of Gideon's fluffy head beneath my hand.

And so, I vow to enjoy more of these escapes.
Have them happen more than just during vacations.
Share them with my daughter.
Schedule them. Spontaneously do 'em. 
Simply perfect.


In my quest to simplify, I don't go to thrift stores anymore. 
But at the antique mall where I have my booth, 
I chanced upon a huge stack of these salesman button sample cards, and I couldn't pass them up.
I bought four and plan on hanging them "as is" on the wall in my craft room.
[Excuse the IG image; will take a better picture once I hang them.]


Wednesday, April 9, 2014

Love Birds

A friend asked me to help her with her May wedding.
This is a second marriage for both her and her fiancé.
There's a specialness to it 
that comes from two people living busy and established lives, nurturing careers, having raised kids, 
and then finding each other
and falling in love — a love infused with the joy and passion of
youth coupled with the wisdom, patience
and forgiveness of wise older souls.
It's an honor.

Julie came on Sunday to see the staging of ideas
I'd brainstormed, created and curated.

And, folks, we have us a wedding.

Here are a few snippets of what 
we looked at and discussed on Sunday while sipping champagne
and listening to Michael Buble. 
[Forgive the poor-quality images.]

Julie has gravitated toward a bird theme.
Her Pinterest wedding board is all about the birds.
The wedding invitation is so beautiful . . . 
birds on twigs.
I can do something quite lovely with birds.

A fifteen-pane window that gal pal Ali
salvaged from the roadside and handed off to me as an 
"I just knew you would put this to good use" piece, 
got a coat of Annie Sloan chalkpaint in the loveliest
of warm whites.
It's been put to use in a grand way for
Julie and Alan's big day.


I attempted a DIY mercury glass vase, which turned out beautifully.
And so easy to do!
For staging flowers, find a picture of the arrangement 
you want online and then print it out in color and cut it out.
This was a flower arrangement that Julie pinned. 
It's what I plan on doing for the table arrangements.
And for staging purposes,
a print out is way easier than purchasing the exact flowers.
I just glued a piece of foam core to the back, stuck a wooden skewer into the foam core,
then the other end of the skewer into floral foam in the vase.

Here's the tutorial that I used, but I think for the rest of the vases,
I'm going to try this one.

Tuesday, February 18, 2014

L Is For The Way You Look At Me

Valentine's Day has become a gimme on the list of celebrations here at Unboundary.
For 2014, I wanted to do a hanging installation of candy hearts. 
The snow and ice thwarted the initial effort to hang them at the windowed entrance to the office,
but gave way to a better option: to hang them around the party venue 
(thank you, Jessie, for your vision!).
Large hearts showcased our names, and medium-sized and smaller hearts 
carried the usual candy-heart sentiments.
[Google seemed to be on the same candy heart bandwagon with their Valentine's Day homepage!]

Here's the party.
Wine, good food, and opening our Valentine cards . . .
it's a holiday, smack dab in the middle of dreary winter, 
that warms the soul like a summer sky.

[Photo credit: Tod Martin]

I really struggled with my Valentine cards this year.
Typically, I'd have them done by end of January, but the creativity just wasn't flowing, and it was approaching the week before the big day.
I brainstormed while browsing Pinterest, I lay in bed at night hoping a dream would 
jolt me awake with "the idea", I locked myself in my craft room and glued, bejeweled and trimmed with no outcome worth salvaging, much less gifting to my coworkers.
Then I remembered the quotes I had incorporated into a going-away event for our pastor. 
Done and done.
I went online and found all kinds of quotes about love.
I collected 24 of them, 2 for each coworker, 
and totally got into figuring out who would get which quotes.

I printed out the quotes on a nice matte-finish ivory stock. Cut them out.
Then sewed them onto fabric. Cut the fabric with pinking sheers so that it peeked out from the card.
I opted for a pretty pink floral and a primitive leaf pattern in black and blue/gray.


I tucked one-of-each-fabric quote into a glassine sleeve; 
for the girls I put the floral on top, and for the guys, the blue leaf.
Folded the envelope, and under the flap taped an ivory satin ribbon 
stamped with the recipient's name.
Then sealed the envelope with a printed circle "Happy Valentine's Day! Dawn E. girl"


For my card-collecting vessel this year (last year I used a vintage mailbox), I went with 
an IKEA planter tied with a pink ribbon and a glass heart-shaped charm.


The love didn't stop at the Valentine's Party! With Harleigh home for the weekend (a camp commitment helping with interviews), we were able to also celebrate her birthday! She turns 22 this Thursday. I got her a Betty Crocker cookbook. I don't care that she'll use her smartphone (googling, Pinterest, etc.) for finding recipes and looking up cooking tips; everyone needs this book on a kitchen shelf. I still refer to mine!


Since she's so smitten with lambs, I decided to get her something sheep-related and frivolous and adorable, something that she'd never get for herself. I found this resin lamb online. It's sort of like my ceramic Old English Sheepdog that has no use, but that I'd never part with.

You might also like . . .

Related Posts with Thumbnails